
Stove Grease Buildup Bathroom Guide Part 1
Introduction
Grease buildup in the bathroom might sound unusual, but it can occur, especially if you cook frequently and your kitchen shares space with your bathroom. Grease can find its way through vents and ducts, settling on surfaces and leading to unsightly stains and odors. This guide will help you understand what causes this problem, how to fix it, and how to prevent it in the future.
What Causes Bathroom Grease Buildup?
Grease buildup in the bathroom can result from several factors:
1. Shared Air Vents: If your kitchen and bathroom share ventilation, airborne grease can travel through ducts and settle in the bathroom.
2. Humidity: High humidity in the bathroom can trap grease particles, causing them to stick to surfaces.
3. Cleaning Products: Residue from cleaning products can mix with grease, making it more challenging to remove.
4. Lack of Ventilation: Poor airflow can exacerbate the issue, allowing grease to accumulate.
Why This Problem Happens
Grease buildup happens primarily due to the nature of grease itself. It is sticky and can bond with dust, dirt, and moisture in the air. In bathrooms, where steam and humidity are common, grease can cling to surfaces such as mirrors, walls, and light fixtures.
Furthermore, the shared airspace between kitchens and bathrooms can lead to the transfer of grease particles. If you frequently cook and don’t ventilate properly, the combination of cooking grease and bathroom humidity creates an ideal environment for buildup.
How to Fix Bathroom Grease Buildup (Step-by-Step)
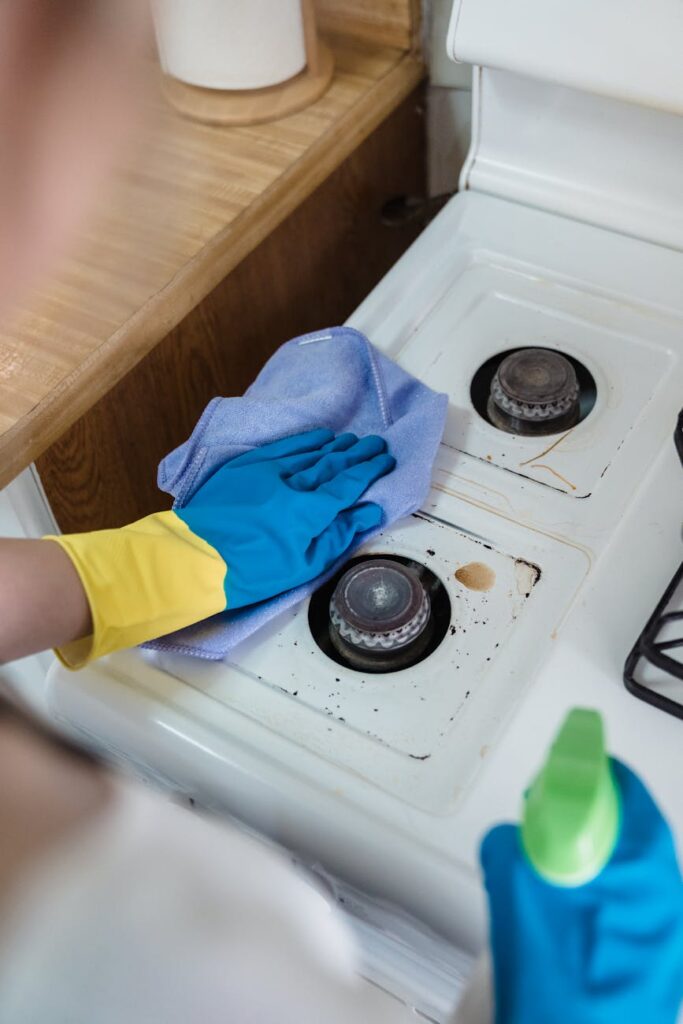
Step 1: Gather Your Supplies
Before you start cleaning, gather the following supplies:
- Degreaser or dish soap
- Baking soda
- White vinegar
- Spray bottle
- Soft cloths or sponges
- Scrub brush
- Bucket
- Warm water
- Gloves (optional)
Step 2: Clear the Area
Remove any items from countertops, shelves, and other surfaces in your bathroom. This will give you a clear space to work and prevent any items from getting damaged.
Step 3: Apply a Degreaser
Spray your degreaser or a mixture of dish soap and warm water directly onto the greasy surfaces. Let it sit for about 10-15 minutes to penetrate the grease.
Step 4: Scrub the Surfaces
Using a soft cloth or sponge, scrub the affected areas. For stubborn grease, a scrub brush can be helpful. Be sure to use a gentle touch to avoid scratching surfaces.
Step 5: Rinse with Warm Water
After scrubbing, rinse the area with warm water to remove the cleaning solution and loosened grease. Use a clean cloth or sponge for this step.
Step 6: Use Baking Soda and Vinegar (Optional)
For persistent grease spots, sprinkle baking soda on the area and spray white vinegar over it. Let it fizz for a few minutes, then scrub gently and rinse.
Step 7: Dry Surfaces
Finally, dry the surfaces with a clean cloth to prevent water spots and mildew.
Best Cleaning Methods
1. Degreaser: Commercial degreasers are effective for tough grease. Look for biodegradable options for a safer choice.
2. Dish Soap: A mixture of dish soap and warm water works wonders for lighter grease buildup.
3. Baking Soda and Vinegar: This natural duo is effective for tough stains and also deodorizes.
4. Steam Cleaning: If you have a steam cleaner, it can help loosen grease without chemicals.
Common Mistakes to Avoid
1. Using the Wrong Tools: Avoid abrasive sponges that can scratch surfaces. Use soft cloths instead.
2. Not Allowing Products to Sit: Letting cleaning solutions sit for the recommended time is crucial for effectiveness.
3. Skipping Rinsing: Always rinse surfaces thoroughly to remove cleaning products and residue.
4. Ignoring Ventilation: Failing to ventilate your bathroom can cause more buildup. Always use an exhaust fan or open windows while cleaning.
Prevention Tips
1. Ventilate: Ensure proper ventilation in both your kitchen and bathroom to minimize grease accumulation.
2. Regular Cleaning: Clean your bathroom surfaces weekly to prevent grease from building up.
3. Use a Good Exhaust Fan: Install a quality exhaust fan in your bathroom to help remove humidity and airborne particles.
4. Cover Cooking: Use lids while cooking to minimize grease particles from escaping into the air.
5. Wipe Down Surfaces: After cooking, quickly wipe down any surfaces that may have collected grease.
Frequently Asked Questions
1. How often should I clean for grease buildup?
Aim to clean your bathroom surfaces at least once a week to prevent grease and grime buildup.
2. Can I use vinegar on all surfaces?
While vinegar is generally safe, avoid using it on natural stone surfaces like granite or marble, as it can damage them.
3. Is it safe to mix baking soda and vinegar?
Yes, mixing baking soda and vinegar is safe and can be an effective cleaning solution, but do not store the mixture as it will lose potency.
4. What type of degreaser should I use?
Choose a biodegradable degreaser for a safer and environmentally friendly option.
5. How can I tell if grease is building up?
Look for dark, sticky spots on surfaces, particularly around light fixtures, mirrors, and walls.
6. What should I do if the grease doesn’t come off?
If the grease remains stubborn, consider using a commercial degreaser, or consult a professional cleaning service for assistance.
By following these guidelines, you can effectively tackle grease buildup in your bathroom and maintain a clean and fresh environment. Stay tuned for Part 2, where we’ll delve into more advanced cleaning techniques and products!