
Shower Tile Mold Stains Guide Part 1
Introduction
Mold stains on shower tiles can be an unsightly and persistent problem for homeowners. They not only affect the appearance of your bathroom but can also lead to larger issues if not addressed promptly. This guide will help you understand the causes of these stains, how to effectively remove them, and how to prevent future occurrences.
What Causes Stains?
Mold stains typically occur due to a combination of moisture and organic materials. Here are the primary contributors:
- Humidity: Showers create a hot, humid environment that is ideal for mold growth.
- Soap Scum: Residue from soaps and shampoos can provide nutrients that mold thrives on.
- Hard Water: Mineral deposits from hard water can contribute to the staining and make it easier for mold to cling to surfaces.
- Poor Ventilation: Bathrooms that lack proper airflow tend to trap moisture, promoting mold growth.
- Lack of Cleaning: Infrequent cleaning allows stains and mold to build up over time.
- Inadequate Airflow: Poor ventilation keeps the moisture levels high, creating an ideal breeding ground for mold.
- Neglected Grout Lines: Grout is porous and can absorb moisture, making it a hotspot for mold.
- Rubber gloves
- A scrubbing brush or old toothbrush
- Spray bottle
- Baking soda
- White vinegar
- Hydrogen peroxide (optional)
- Commercial mold remover (optional)
- Remove any items from the shower, such as toiletries and towels.
- Ensure good ventilation by opening a window or turning on the exhaust fan.
- Baking Soda and Vinegar: Mix equal parts of baking soda and vinegar to create a paste. If using hydrogen peroxide, mix it in a 1:1 ratio with water in a spray bottle.
- Apply the paste or spray the solution directly onto the stained areas. Make sure to cover all affected spots thoroughly.
- Allow the solution to sit for at least 15 minutes. This will give it time to penetrate and break down the mold.
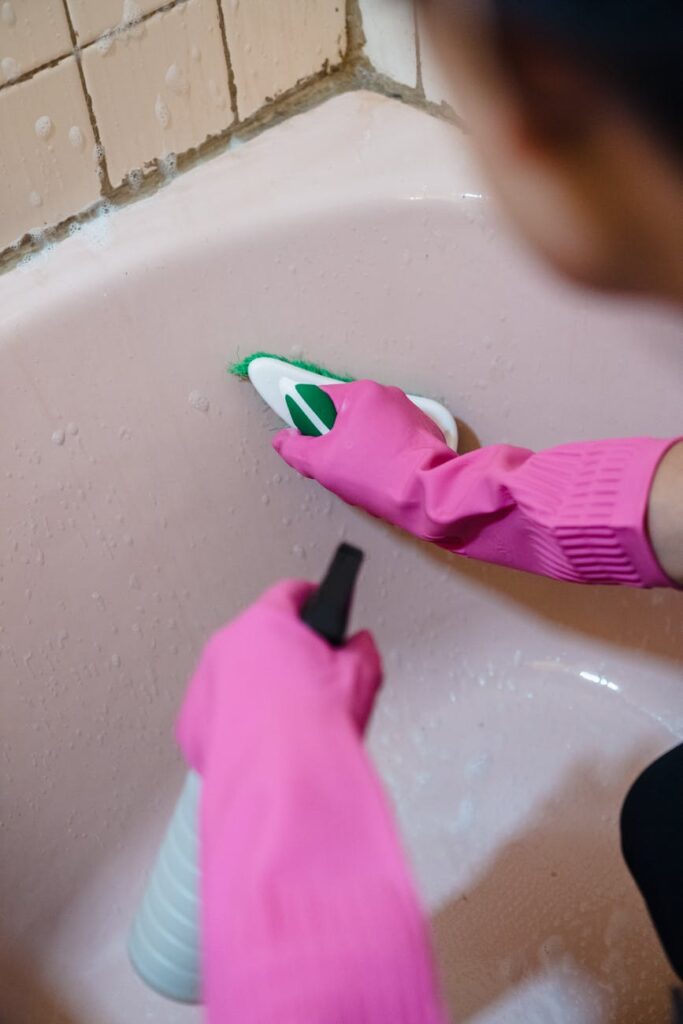
- Use a scrubbing brush or old toothbrush to scrub the stained areas. Pay extra attention to grout lines, as mold often hides there.
- Rinse the area with warm water to remove the cleaning solution and any loosened mold.
- Use a squeegee or towel to dry the tiles. This reduces moisture and helps prevent future mold growth.
- Ignoring Grout: Mold often hides in grout lines, so don’t neglect them during cleaning.
- Using Too Much Water: Excessive water can promote further mold growth. Always dry the area after cleaning.
- Not Ventilating Properly: Failing to ventilate the bathroom can lead to moisture buildup, encouraging mold return.
- Overusing Harsh Chemicals: Strong chemicals can damage tiles and grout. Use milder solutions when possible.
- Ventilation: Install an exhaust fan and use it during and after showers to reduce humidity.
- Regular Cleaning: Clean your shower weekly to prevent mold buildup.
- Squeegee After Use: Use a squeegee to remove water from tiles after each shower.
- Seal Grout: Apply a grout sealer every few years to make it less absorbent and resistant to mold.
- Use Mold-Resistant Products: Consider using mold-resistant shower curtains and bath mats.
Understanding these factors is crucial for effective cleaning and prevention.
Why This Problem Happens
Mold stains occur when spores settle on damp surfaces and begin to grow. This process is accelerated in environments that are warm and humid. Here’s a closer look at why this happens:
Recognizing these contributing factors can help you tackle the problem effectively.
How to Fix Stains (Step-by-Step)
Follow these steps to effectively remove mold stains from your shower tiles:
Step 1: Gather Your Supplies
You will need:
Step 2: Prepare the Area
Step 3: Make a Cleaning Solution
Step 4: Apply the Solution
Step 5: Let It Sit
Step 6: Scrub the Stains
Step 7: Rinse Thoroughly
Step 8: Dry the Area
Best Cleaning Methods
Here are some effective cleaning methods for tackling shower tile mold stains:
1. Baking Soda and Vinegar
This natural method is effective and non-toxic. The combination of baking soda’s abrasiveness and vinegar’s acidity helps to lift stains and kill mold.
2. Hydrogen Peroxide
Hydrogen peroxide is an effective mold killer. Spray it directly onto the stains, let it sit for 10 minutes, then scrub and rinse.
3. Commercial Mold Removers
For severe mold problems, consider using a commercial cleaner specifically designed for removing mold and mildew. Always follow the manufacturer’s instructions.
4. Bleach
While bleach can be effective, it is harsh and can damage grout and tile finishes. Use it as a last resort, and always ensure the area is well-ventilated.
Common Mistakes to Avoid
Avoid these common pitfalls when dealing with mold stains:
Prevention Tips
Preventing mold stains in your shower is crucial for maintaining a clean bathroom. Here are some effective prevention strategies:
Frequently Asked Questions
1. How often should I clean my shower to prevent mold stains?
Aim to clean your shower at least once a week to prevent mold buildup.
2. Can I use bleach to remove mold stains?
Yes, bleach can be used, but it should be a last resort due to its harshness. Always ensure good ventilation when using bleach.
3. What are the signs of mold in my shower?
Signs include discoloration on tiles or grout, a musty smell, and visible mold patches.
4. Is it safe to use commercial mold removers?
Yes, as long as you follow the manufacturer’s instructions and take necessary safety precautions, such as wearing gloves and ensuring ventilation.
5. What should I do if the mold keeps coming back?
If mold returns quickly, it may indicate underlying plumbing issues or persistent moisture problems. Consider consulting a professional.
6. Can I prevent mold stains with home remedies?
Yes, regular cleaning with vinegar or baking soda can help prevent mold stains effectively.
Conclusion
Dealing with mold stains on shower tiles can be a hassle, but understanding the causes and applying effective cleaning methods can make the process manageable. By following the steps outlined in this guide and implementing preventive measures, you can keep your shower clean and free from unsightly stains. Stay tuned for Part 2, where we will cover advanced cleaning techniques and tools for tackling stubborn mold.