
Shower Tile Mold Bathroom Guide Part 1
Introduction
Mold in the shower can be a persistent and unsightly problem for many homeowners. Not only does mold thrive in damp environments, but it can also lead to health concerns and unsightly stains on your tiles. This guide will provide you with practical solutions to tackle mold in your shower tiles, empowering you to maintain a clean and healthy bathroom.
What Causes Bathroom Mold?
Mold growth in your shower is primarily caused by a combination of moisture, warmth, and organic materials. Here are the main contributors:
1. High Humidity: Bathrooms are often humid due to hot showers, creating an ideal breeding ground for mold.
2. Poor Ventilation: Lack of airflow can trap moisture, making it difficult for surfaces to dry properly.
3. Soap Scum and Dirt: Residue from soap and dirt can provide organic material for mold to feed on.
4. Leaky Fixtures: Dripping faucets or showerheads can increase moisture levels, leading to mold growth.
5. Old Grout: Worn or cracked grout can trap moisture and dirt, providing a perfect environment for mold.
Why This Problem Happens
Understanding why mold occurs in your shower can help you address the root causes. Here’s a breakdown:
- Moisture Retention: After a shower, water can linger on tiles and grout. If not cleaned up, this moisture allows mold spores to settle and grow.
- Temperature Fluctuations: Warm temperatures from hot showers can increase humidity, which encourages mold growth.
- Neglected Cleaning: Infrequent cleaning can lead to the accumulation of soap scum and other residues that foster mold.
- Inadequate Cleaning Products: Using ineffective cleaning products can leave behind residues that promote mold growth.
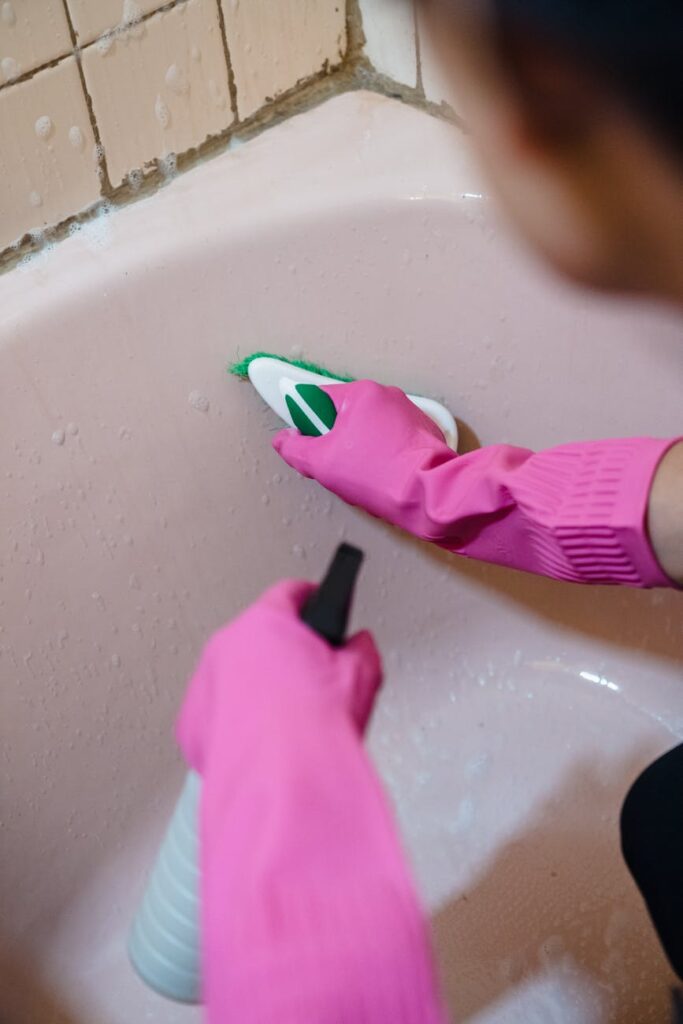
- Rubber gloves
- Protective eyewear
- Scrub brush or sponge
- Spray bottle
- Cleaning solution (store-bought or homemade)
- Old toothbrush (for grout)
- Bucket
- Towels
How to Fix Bathroom Mold (Step-by-Step)
Removing mold from your shower tiles requires a systematic approach. Follow these steps for effective mold removal:
Step 1: Gather Your Supplies
You will need:
Step 2: Prepare the Area
1. Ventilate: Open windows or turn on the exhaust fan to improve airflow.
2. Protect Surfaces: Cover nearby surfaces with towels to catch any drips from the cleaning process.
Step 3: Apply Cleaning Solution
1. Choose Your Cleaner: You can use a commercial mold remover or make your own. A mixture of equal parts white vinegar and water is effective.
2. Spray Generously: Apply the cleaning solution to the affected areas, focusing on grout lines and where mold is visible.
Step 4: Let It Sit
Allow the solution to sit for at least 10-15 minutes. This waiting period helps to break down the mold.
Step 5: Scrub the Area
1. Use a Scrub Brush: Gently scrub the tiles and grout with a scrub brush or sponge until the mold is removed.
2. Old Toothbrush for Grout: For stubborn mold in grout lines, use an old toothbrush to get into tight spaces.
Step 6: Rinse Thoroughly
After scrubbing, rinse the area thoroughly with warm water to remove any cleaning solution and mold residue.
Step 7: Dry the Area
Use towels to dry the tiles and grout completely, as moisture can lead to mold returning.
Best Cleaning Methods
Here are some effective cleaning methods to combat mold:
1. Vinegar and Baking Soda: A mixture of vinegar and baking soda creates a powerful cleaning agent. Apply baking soda to the moldy area, then spray with vinegar and let it fizz before scrubbing.
2. Hydrogen Peroxide: This is another effective mold killer. Spray 3% hydrogen peroxide directly onto the moldy area, let it sit for 10 minutes, then scrub and rinse.
3. Commercial Cleaners: There are many mold-specific cleaners available. Look for products that contain bleach or other anti-fungal agents.
4. Steam Cleaning: A steam cleaner can effectively kill mold spores without the need for harsh chemicals.
Common Mistakes to Avoid
To ensure successful mold removal, avoid these common pitfalls:
1. Using Just Water: Water alone won’t kill mold. Always use a cleaning solution.
2. Not Allowing Enough Time: Rushing the cleaning process can lead to ineffective mold removal. Let cleaners sit for the recommended time.
3. Ignoring Grout: Mold often hides in grout lines. Don’t neglect this area when cleaning.
4. Not Drying Properly: Failing to dry the area can lead to a quick return of mold.
5. Neglecting Ventilation: After cleaning, ensure proper ventilation to help prevent future mold growth.
Prevention Tips
Preventing mold from returning is crucial for maintaining a clean shower. Here are some effective strategies:
1. Increase Ventilation: Use exhaust fans and open windows to reduce humidity.
2. Wipe Down Surfaces: After showering, use a squeegee or towel to dry tiles and prevent water buildup.
3. Regular Cleaning Schedule: Clean your shower at least once a week to remove soap scum and prevent mold.
4. Seal Grout: Consider sealing grout to prevent moisture infiltration.
5. Use Mold-Resistant Products: Opt for mold-resistant shower curtains and bath mats.
6. Fix Leaks Promptly: Address any leaks immediately to reduce moisture.
Frequently Asked Questions
1. How often should I clean my shower to prevent mold?
Aim to clean your shower at least once a week. Regular maintenance helps prevent mold buildup.
2. Can I use bleach to remove mold?
Yes, bleach is effective against mold. However, it can discolor grout, so use it carefully and ensure proper ventilation.
3. Is mold on shower tiles dangerous?
While not all mold is harmful, some can cause allergic reactions or respiratory issues. It’s best to address mold growth promptly.
4. Can I prevent mold without chemicals?
Yes, using natural solutions like vinegar and baking soda can be effective for mold removal.
5. What type of grout is best for mold prevention?
Epoxy grout is more resistant to mold than traditional cement-based grout due to its non-porous nature.
6. How do I know if mold is hiding behind tiles?
Signs of hidden mold include discoloration, a musty smell, or water stains on walls. If you suspect mold behind tiles, consider consulting a professional.
By following this guide, you can effectively tackle shower tile mold and create a fresher, cleaner bathroom environment. Stay tuned for Part 2, where we’ll dive deeper into advanced cleaning techniques and tackle more specific mold challenges.