
Shower Head Cleaning Bathroom Guide Part 1
Introduction
Keeping your shower head clean is essential for maintaining a pleasant bathing experience and ensuring optimal water flow. Over time, mineral deposits, mold, and soap scum can accumulate, leading to unsightly stains and reduced water pressure. In this guide, we’ll explore what causes these issues, why they occur, effective cleaning methods, and how to prevent future build-up.
What Causes Bathroom?
The bathroom is a prime environment for grime due to its high humidity levels and frequent exposure to water. In particular, shower heads can be affected by the following:
1. Hard Water: If your home has hard water, minerals like calcium and magnesium can build up in your shower head, causing clogs and reduced water flow.
2. Soap Scum: This is a combination of soap residue and minerals from water that can stick to your shower head, making it look dirty and uninviting.
3. Mold and Mildew: The warm, moist conditions of a bathroom can lead to fungal growth, especially in the crevices of your shower head.
4. Neglect: Regular cleaning is essential. If you don’t clean your shower head periodically, the build-up will worsen over time.
Why This Problem Happens
Understanding why your shower head becomes dirty is crucial for effective cleaning.
- Mineral Deposits: Hard water is one of the main culprits. When water evaporates, it leaves behind minerals that accumulate over time.
- Soap Residue: Daily use of soaps and shampoos can lead to a residue that clings to your shower head, especially if not rinsed thoroughly.
- Environmental Factors: Dust, humidity, and temperature fluctuations can contribute to grime accumulation.
- Lack of Maintenance: The longer you wait to clean your shower head, the harder it becomes to remove built-up deposits.
- White vinegar
- A plastic bag or bowl
- Rubber band or string
- Old toothbrush or soft scrub brush
- Baking soda (optional)
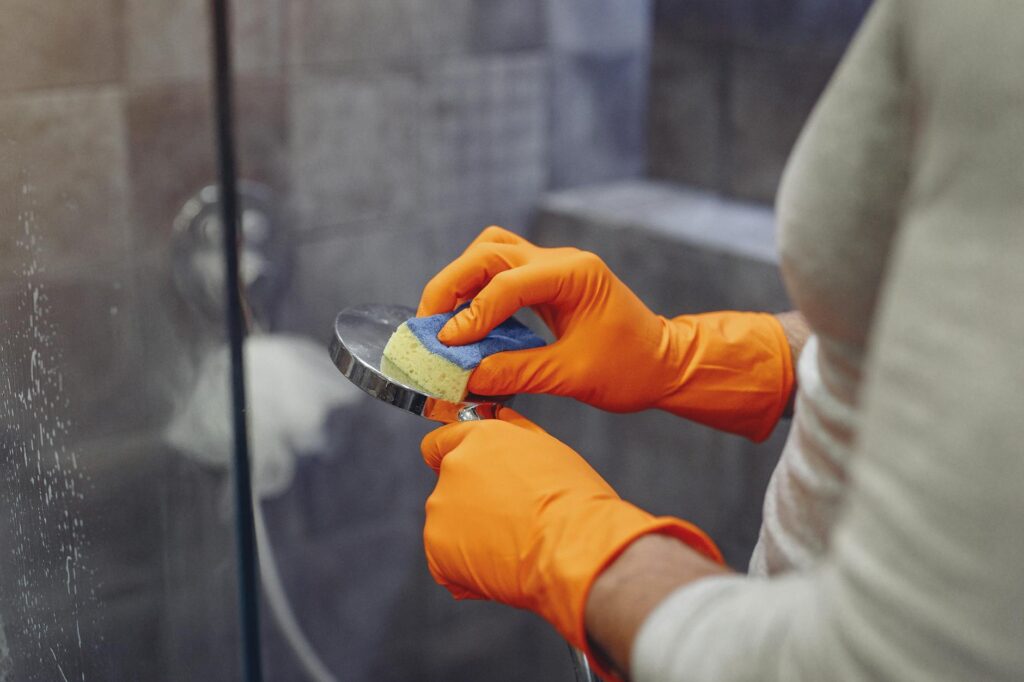
- Soft cloth or sponge
How to Fix Bathroom (Step-by-Step)
Cleaning your shower head is a simple process that can be done in a few easy steps. Here’s how to tackle it:
Step 1: Gather Your Supplies
You will need:
Step 2: Prepare the Vinegar Solution
Fill a plastic bag or bowl with white vinegar. Vinegar is an effective natural cleaner due to its acidity, which helps dissolve mineral deposits.
Step 3: Soak the Shower Head
If your shower head is detachable, remove it and place it in the vinegar solution. If it’s fixed, secure the bag filled with vinegar around the shower head using a rubber band or string. Ensure the shower head is fully submerged in the vinegar.
Step 4: Let It Soak
Allow the shower head to soak for at least 30 minutes. For heavy build-up, leave it for several hours or overnight if possible.
Step 5: Scrub the Shower Head
After soaking, use an old toothbrush or soft scrub brush to gently scrub away any remaining deposits. Pay special attention to any nozzles or crevices.
Step 6: Rinse Thoroughly
Rinse the shower head under warm water to remove any remaining vinegar and loosened deposits. If you notice stubborn spots, you can sprinkle some baking soda on the affected areas and scrub again.
Step 7: Reattach and Test
If you removed the shower head, reattach it and turn on the water to check for proper flow. You should notice an improvement in water pressure.
Best Cleaning Methods
Different methods can be effective based on the severity of the build-up:
1. Vinegar Soak: The most effective and simplest method. Vinegar dissolves mineral deposits effectively.
2. Baking Soda Paste: Combine baking soda with a little water to form a paste. Apply this to particularly stubborn areas, allowing it to sit for 10-15 minutes before scrubbing.
3. Commercial Cleaners: For severe build-up, consider using a commercial descaling product designed for shower heads. Always follow the manufacturer’s instructions.
4. Dish Soap Solution: For soap scum, a mixture of warm water and dish soap can be effective. Use a cloth to wipe down the shower head and rinse thoroughly.
Common Mistakes to Avoid
1. Not Soaking Long Enough: For tough build-up, a longer soak in vinegar or a cleaning solution is often necessary.
2. Using Abrasive Cleaners: Avoid harsh chemicals or abrasive scrubbers that can scratch the surface of your shower head.
3. Neglecting the Nozzles: Make sure to clean all parts of the shower head, including the nozzles where water comes out.
4. Skipping Regular Maintenance: Failing to clean regularly will lead to more significant problems and harder cleaning jobs in the future.
Prevention Tips
1. Regular Cleaning: Aim to clean your shower head every month to prevent build-up.
2. Install a Water Softener: If you have hard water, consider installing a water softening system to reduce mineral deposits.
3. Wipe Down After Use: After showering, quickly wipe down the shower head with a soft cloth. This helps prevent soap scum and mineral build-up.
4. Use a Squeegee: A squeegee can help remove excess water and soap residue from the shower walls and fixtures after each use.
Frequently Asked Questions
1. How often should I clean my shower head?
Aim to clean your shower head at least once a month to prevent build-up.
2. Can I use bleach to clean my shower head?
It’s not recommended; bleach can damage the finish and cause discoloration. Stick with vinegar or baking soda.
3. What if my shower head has hard water stains?
Soak it in vinegar and scrub with a soft brush. For tough stains, a baking soda paste may be required.
4. Is it safe to leave vinegar on my shower head overnight?
Yes, vinegar is safe for most shower heads. However, if your shower head has a special finish, check the manufacturer’s guidelines.
5. Why does my shower head have low water pressure?
Low water pressure could be due to mineral build-up restricting flow. Regular cleaning can help alleviate this issue.
6. Can I use a commercial cleaner instead of vinegar?
Yes, but always follow the manufacturer’s instructions and ensure it’s safe for your shower head’s material.
By following this guide, you’ll keep your shower head clean and functioning optimally, enhancing your overall bathroom experience. Regular maintenance will save you time and effort in the long run, making your cleaning routine more manageable. Happy cleaning!