
Shower Grime Removal: Mould & Damp Guide Part 1
Introduction
Mould and dampness in your shower can be both unsightly and a nuisance. Not only does it make your bathroom look unclean, but it can also lead to unpleasant odors and contribute to a less hygienic environment. This guide will provide you with actionable steps to tackle mould and damp in your shower effectively.
What Causes Mould & Damp?
Mould thrives in damp conditions, making showers a perfect breeding ground. The primary causes include:
- High Humidity: Showers produce steam, which increases moisture in the air.
- Poor Ventilation: Lack of airflow can trap moisture, creating a conducive environment for mould growth.
- Water Leaks: Leaking pipes or fixtures can lead to persistent dampness.
- Dirty Surfaces: Soap scum and body oils can provide nutrients for mould to grow.
- Rubber gloves
- Scrubbing brush or sponge
- Bucket
- White vinegar
- Baking soda
- Spray bottle
- Bleach (optional)
- Old cloths or towels
- Vinegar: Naturally acidic, vinegar is excellent for killing mould spores.
- Baking Soda: A mild abrasive that can scrub away grime without scratching surfaces.
- Hydrogen Peroxide: A safer alternative to bleach, effective against mould.
- Commercial Mould Removers: Look for products specifically designed for bathroom use. Always follow the instructions on the label.
- Ignoring Ventilation: Always ensure your bathroom is well-ventilated during and after your shower.
- Using Too Much Bleach: Using bleach excessively can damage surfaces and create harmful fumes.
- Neglecting Regular Cleaning: Make a regular cleaning schedule to prevent accumulations.
- Not Drying Surfaces: Always dry your shower after use to minimize moisture.
Understanding these causes is the first step toward effective cleaning and prevention.
Why This Problem Happens
Mould and damp can become prevalent in your shower for several reasons:
1. Temperature Fluctuations: Warm air holds more moisture. When it cools, the moisture condenses on cooler surfaces, creating damp spots.
2. Infrequent Cleaning: Regular cleaning prevents the accumulation of soap scum and grime, which can trap moisture and promote mould growth.
3. Inadequate Drying: Leaving wet towels or bath mats in the bathroom can contribute to increased humidity.
4. Material Choice: Certain materials, like porous tiles or unsealed grout, can absorb water and promote dampness.
How to Fix Mould & Damp (Step-by-Step)
If you’re facing mould and damp in your shower, follow these steps for effective removal:
Step 1: Gather Your Supplies
You’ll need:
Step 2: Ventilate the Area
Open windows and doors to improve airflow. If possible, turn on the bathroom fan to help reduce humidity.
Step 3: Apply Vinegar Solution
1. In a spray bottle, mix equal parts of white vinegar and water.
2. Spray the affected areas generously.
3. Let it sit for at least 30 minutes to penetrate the mould.
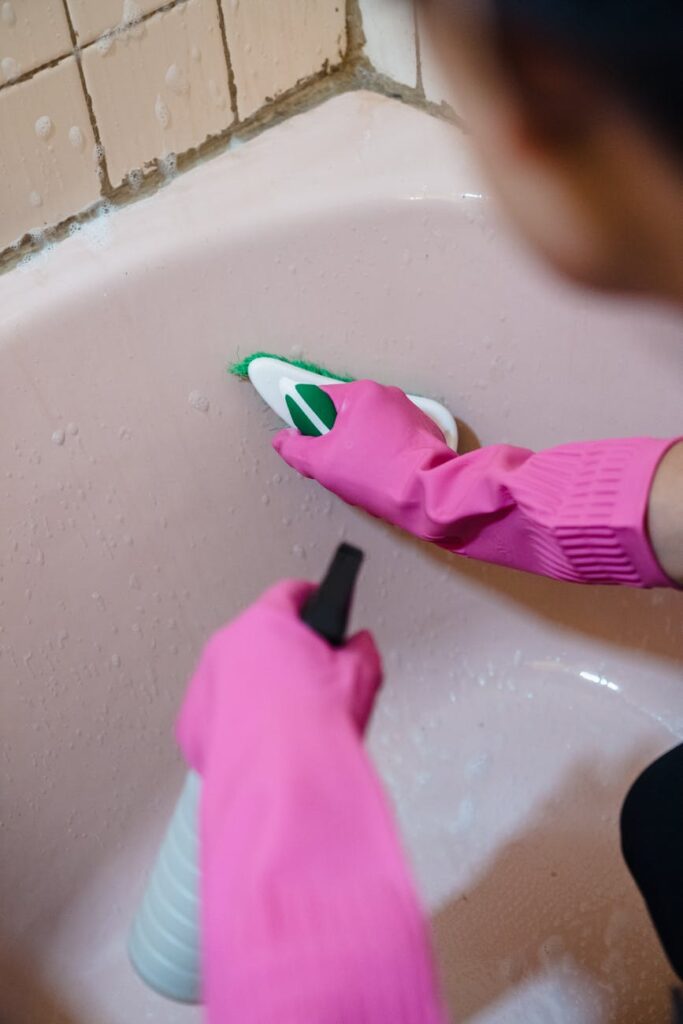
Step 4: Scrub the Surfaces
Using a scrubbing brush or sponge, scrub the mouldy areas. Focus on grout lines, corners, and any crevices.
Step 5: Rinse Thoroughly
After scrubbing, rinse the surfaces with warm water to remove any remaining vinegar and mould.
Step 6: Apply Baking Soda
1. For stubborn stains, sprinkle baking soda on the affected areas.
2. Scrub again, then rinse thoroughly.
Step 7: Optional Bleach Application
For persistent mould, you can use a diluted bleach solution (1 part bleach to 10 parts water). Apply it carefully to the affected areas, let it sit for 10 minutes, and then rinse thoroughly.
Step 8: Dry the Area
Use old cloths or towels to dry off all surfaces. Ensure everything is completely dry to prevent mould from returning.
Best Cleaning Methods
Different cleaning methods can be effective against mould and damp:
Common Mistakes to Avoid
When tackling mould and damp, avoid these common pitfalls:
Prevention Tips
Preventing mould and damp is easier than removing it. Here are some tips to keep your shower clean:
1. Improve Ventilation: Install an exhaust fan or open a window during and after showers.
2. Use a Squeegee: After each shower, use a squeegee on the walls and doors to remove excess water.
3. Regular Cleaning: Clean your shower at least once a week using mild cleaning solutions to prevent grime buildup.
4. Seal Grout and Tiles: Apply a sealant to grout and tiles to prevent moisture absorption.
5. Keep Towels Dry: Hang towels and bath mats to dry after use, and wash them regularly.
6. Use Mould-Resistant Products: Consider using mould-resistant paints and shower curtains.
Frequently Asked Questions
1. How often should I clean my shower to prevent mould?
Aim to clean your shower at least once a week to prevent grime and mould buildup.
2. Can I use vinegar on all surfaces?
While vinegar is generally safe for most surfaces, avoid using it on natural stone, as it can cause damage.
3. What should I do if the mould keeps coming back?
If mould keeps returning, check for leaks and improve ventilation. You may also want to consult a professional for persistent issues.
4. Is bleach the best solution for mould removal?
Bleach is effective but can be harsh and damage certain surfaces. Consider using vinegar or hydrogen peroxide as safer alternatives.
5. Can I use essential oils for mould prevention?
Some essential oils, like tea tree oil, have mould-resistant properties. However, they should not replace regular cleaning.
6. How can I tell if I have a serious mould problem?
If you notice persistent mould despite cleaning, or if you see mould in hidden areas, such as behind tiles or under the shower base, consider calling a professional.
—
This guide provides a comprehensive approach to tackling mould and damp in your shower. By following these steps and implementing prevention strategies, you can maintain a clean and healthy bathroom environment.