
Mouldy Shower Tiles Cleaning Guide Part 1
Introduction
Mouldy shower tiles can turn your bathroom from a relaxing retreat into an unsightly and potentially unhealthy space. This guide will provide you with practical solutions to tackle mould and keep your shower tiles looking pristine.
What Causes Mould on Shower Tiles?
Mould thrives in damp environments, making your shower an ideal breeding ground. The combination of moisture, warmth, and organic materials like soap scum creates a perfect environment for mould growth.
Why This Problem Happens
Several factors contribute to the presence of mould on your shower tiles:
1. Humidity: High humidity levels, especially in bathrooms, promote mould growth.
2. Poor Ventilation: Lack of airflow traps moisture, allowing mould to flourish.
3. Soap Scum: Residue from soaps and shampoos provides nutrients for mould.
4. Neglected Cleaning: Infrequent cleaning allows mould to establish itself.
Understanding these causes will help you address the problem effectively.
How to Fix Mouldy Shower Tiles (Step-by-Step)
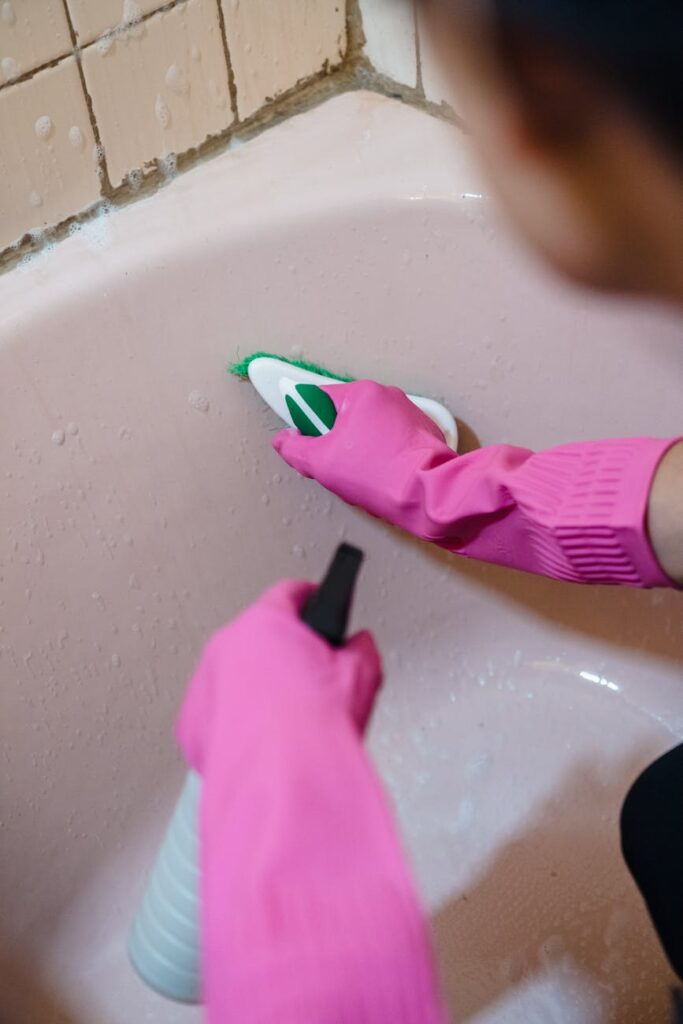
Step 1: Gather Your Supplies
Before you start, gather these materials:
- Rubber gloves
- Scrub brush or old toothbrush
- Bucket
- Spray bottle
- Vinegar or bleach
- Baking soda (optional)
- Microfiber cloths
- Grout sealer (for after cleaning)
- Vinegar Method: Fill a spray bottle with white vinegar. Spray the affected areas generously, allowing it to sit for at least 10 minutes.
- Bleach Method: If vinegar doesn’t work, mix one part bleach to three parts water in a spray bottle. Apply the solution, and let it sit for 10 minutes.
Step 2: Ventilate the Area
Open windows or turn on the bathroom fan to ensure proper ventilation while you clean. This will help disperse fumes from cleaning agents.
Step 3: Apply Cleaning Solution
Step 4: Scrub the Tiles
Using a scrub brush or an old toothbrush, scrub the tiles and grout lines thoroughly. Focus on the areas with visible mould.
Step 5: Rinse
After scrubbing, rinse the tiles with warm water to remove any remaining cleaning solution and mould.
Step 6: Dry the Area
Use a microfiber cloth to dry the tiles completely. This prevents new mould from forming due to lingering moisture.
Step 7: Seal the Grout (Optional)
Once the tiles are clean and dry, consider applying a grout sealer. This will help protect the grout from moisture and staining in the future.
Best Cleaning Methods
1. Vinegar
White vinegar is a natural disinfectant. Its acidic nature helps to break down mould and soap scum effectively.
2. Bleach
Bleach is powerful against mould. It disinfects and sanitizes, but should be used with caution due to its strong fumes.
3. Baking Soda
For a gentle abrasive cleaner, mix baking soda with water to form a paste. This can help scrub stubborn areas without scratching the tiles.
Common Mistakes to Avoid
1. Not Ventilating: Failing to ventilate can lead to inhaling harmful fumes.
2. Using Steel Wool: Avoid steel wool or harsh scrubbers that can scratch tiles.
3. Ignoring Grout: Mould often hides in grout lines; don’t neglect these areas.
4. Skipping Rinse: Leaving cleaning agents on tiles can cause damage and attract more dirt.
5. Using Too Much Solution: More isn’t always better; follow recommended amounts to avoid residue.
Prevention Tips
1. Improve Ventilation: Install an exhaust fan or open windows to reduce humidity.
2. Wipe Down Surfaces: After each shower, wipe tiles and glass with a squeegee or towel to remove moisture.
3. Regular Cleaning: Establish a weekly cleaning routine to keep mould at bay.
4. Use Mould-Resistant Products: Choose mould-resistant shower curtains, tiles, and grout.
5. Keep Shower Dry: Leave the shower door open after use to allow for drying.
Frequently Asked Questions
1. How often should I clean my shower tiles?
Aim to clean your shower tiles at least once a week to prevent mould build-up.
2. Can I use vinegar and bleach together?
No, never mix vinegar and bleach. This creates toxic fumes that can be harmful to your health.
3. What’s the best way to remove soap scum?
Use a mixture of equal parts vinegar and water, or a baking soda paste, to scrub away soap scum effectively.
4. Is it safe to use bleach on all types of tiles?
Check the manufacturer’s guidelines; some tiles can be damaged by bleach. For sensitive surfaces, opt for vinegar.
5. How can I tell if my mould problem is severe?
If you see extensive mould covering large areas or if the mould returns quickly after cleaning, you may need professional help.
6. Can I prevent mould from coming back?
Yes, by improving ventilation, regularly cleaning, and using mould-resistant products, you can significantly reduce the risk of mould returning.
By following this practical guide, you can tackle mouldy shower tiles efficiently and effectively. Stay tuned for Part 2, where we’ll delve deeper into advanced cleaning techniques and tools for maintaining a mould-free bathroom.