
Mouldy Shower Tiles Bathroom Guide Part 2
Introduction
Mouldy shower tiles can turn your bathing sanctuary into an unsightly and unhealthy space. This guide will help you understand what causes mould, why it thrives in your bathroom, and how to effectively tackle the problem. With clear, actionable steps, you’ll be equipped to restore your shower tiles to their former glory and keep them mould-free.
What Causes Bathroom Mould?
Mould thrives in damp, warm environments, making bathrooms the perfect breeding ground. Here are the primary contributors:
1. Humidity: Showers generate a lot of steam, which increases humidity levels.
2. Poor Ventilation: Lack of airflow allows moisture to linger.
3. Water Leaks: Any leaks from pipes or fixtures can create damp spots.
4. Soap Residue: Leftover soap scum can provide nutrients for mould growth.
Understanding these factors will help you address the root causes of mould on your shower tiles.
Why This Problem Happens
Mould develops when spores are exposed to moisture, warmth, and organic materials. In bathrooms, the combination of high humidity from showers, inadequate ventilation, and the presence of soap scum creates an ideal environment for mould to flourish. Additionally, grout lines and porous tile surfaces can trap moisture, making them particularly susceptible to mould growth.
How to Fix Bathroom Mould (Step-by-Step)
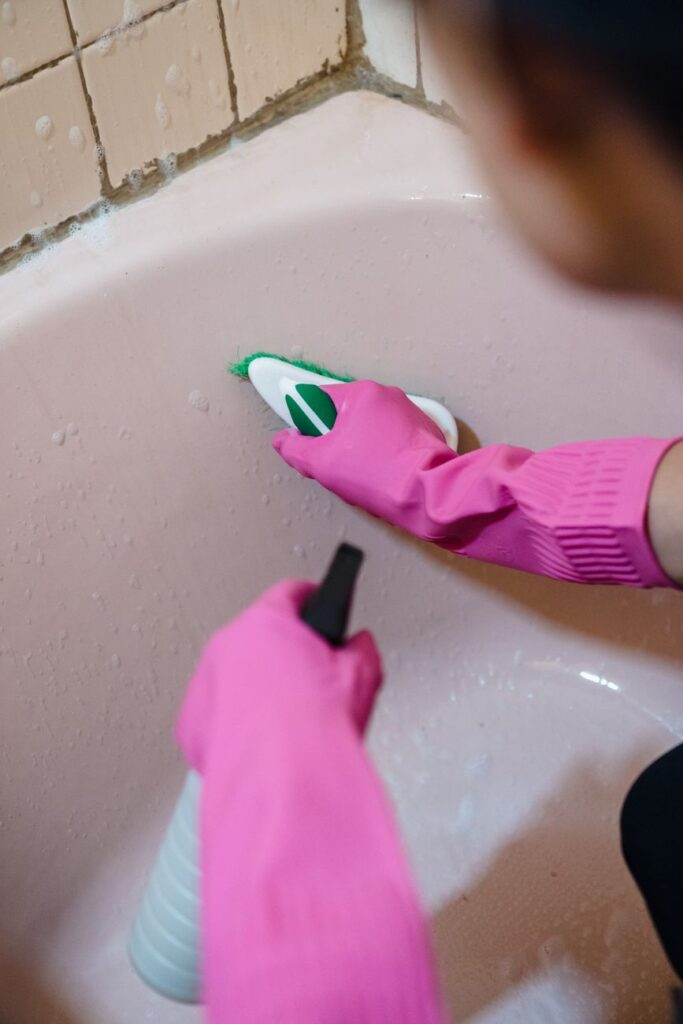
Step 1: Gather Your Supplies
Before you begin cleaning, gather the following items:
- Rubber gloves
- Spray bottle
- Brush with stiff bristles
- Soft cloth
- White vinegar
- Baking soda
- Bleach (or a commercial mould remover)
Step 2: Prepare the Area
1. Clear the Shower: Remove all items from the shower, including toiletries and bath mats.
2. Ventilate the Space: Open windows and turn on the bathroom fan to improve airflow.
Step 3: Apply Cleaning Solution
1. Vinegar Solution: Fill a spray bottle with equal parts white vinegar and water. Spray the affected areas generously.
2. Let it Sit: Allow the solution to sit for at least 10-15 minutes. This will help break down the mould.
Step 4: Scrub the Tiles
1. Use a Brush: After the solution has set, take the stiff-bristle brush and scrub the tiles and grout lines vigorously.
2. Rinse: Rinse the area with warm water.
Step 5: Treat Stubborn Mould
If mould persists, create a paste with baking soda and water. Apply it directly to the affected areas and let it sit for another 10-15 minutes. Scrub again with the brush and rinse thoroughly.
Step 6: Disinfect
For extra disinfection, use a diluted bleach solution (1 part bleach to 10 parts water) on areas with persistent mould. Apply it carefully and ensure good ventilation. Rinse thoroughly after scrubbing.
Step 7: Dry Thoroughly
Wipe down the tiles with a soft cloth to remove excess moisture. Make sure to dry the grout lines as well.
Best Cleaning Methods
1. Vinegar and Baking Soda: A safe, natural method that effectively removes mould without harsh chemicals.
2. Commercial Mold Removers: Look for products specifically designed for mould removal; these can be very effective but follow the instructions carefully.
3. Bleach: While effective, it should be used sparingly due to its harshness. Always ensure proper ventilation and wear gloves.
Common Mistakes to Avoid
1. Ignoring Grout: Mould often hides in grout lines. Make sure to scrub these areas thoroughly.
2. Using Too Much Water: Excessive water can contribute to more mould growth. Always dry the area well after cleaning.
3. Not Ventilating: Failing to ventilate while cleaning can exacerbate the problem. Always ensure airflow.
4. Neglecting Regular Cleaning: A one-off clean won’t suffice. Regular maintenance is essential to prevent mould from returning.
Prevention Tips
1. Improve Ventilation: Install an exhaust fan or open windows to keep humidity levels down during and after showers.
2. Wipe Down Surfaces: After each use, quickly wipe down the tiles and grout to remove moisture.
3. Use Mould-Resistant Products: Consider using mould-resistant paint and grout in your bathroom.
4. Seal Grout Lines: Apply a grout sealer once a year to protect against moisture.
5. Limit Steam: Take shorter showers and consider cooler water to reduce humidity.
Frequently Asked Questions
1. How often should I clean my shower tiles?
Aim to clean your shower tiles at least once a month to prevent mould buildup.
2. Can I use vinegar on all types of tiles?
Vinegar is generally safe for ceramic and porcelain tiles but can damage natural stone surfaces like granite or marble. Always check manufacturer guidelines.
3. Is it safe to use bleach for cleaning mould?
Yes, but it should be used carefully. Ensure good ventilation and wear gloves, as bleach can be harsh on skin and surfaces.
4. What if the mould keeps coming back?
If mould returns frequently, you may have underlying issues such as leaks or poor ventilation. Consider consulting a professional.
5. Can I prevent mould with essential oils?
Some essential oils, like tea tree oil, have natural antimicrobial properties. However, they should not replace regular cleaning routines.
6. How can I tell if the mould is gone?
After cleaning, ensure that the tiles and grout are dry. If there’s no discoloration or musty smell, it’s likely that the mould has been removed.
By following the steps outlined in this guide, you can effectively tackle mouldy shower tiles and maintain a clean, healthy bathroom environment. Regular attention and preventive measures will ensure that your shower remains a relaxing and hygienic space.