
Mouldy Shower Tiles Bathroom Guide Part 1
Introduction
Mouldy shower tiles are a common nuisance in many bathrooms. Not only do they look unsightly, but they can also lead to a range of problems if not addressed. This guide aims to provide straightforward solutions to help you effectively tackle and prevent mould build-up on your shower tiles.
What Causes Mouldy Shower Tiles?
Mould thrives in damp, warm environments, making bathrooms an ideal breeding ground. Several factors contribute to mould on shower tiles:
- High Humidity: Bathrooms often have high humidity levels, especially after showers.
- Poor Ventilation: Lack of airflow can trap moisture.
- Water Residue: Soap scum and water spots can create a perfect environment for mould to grow.
- Neglected Cleaning: Infrequent cleaning allows mould spores to settle and multiply.
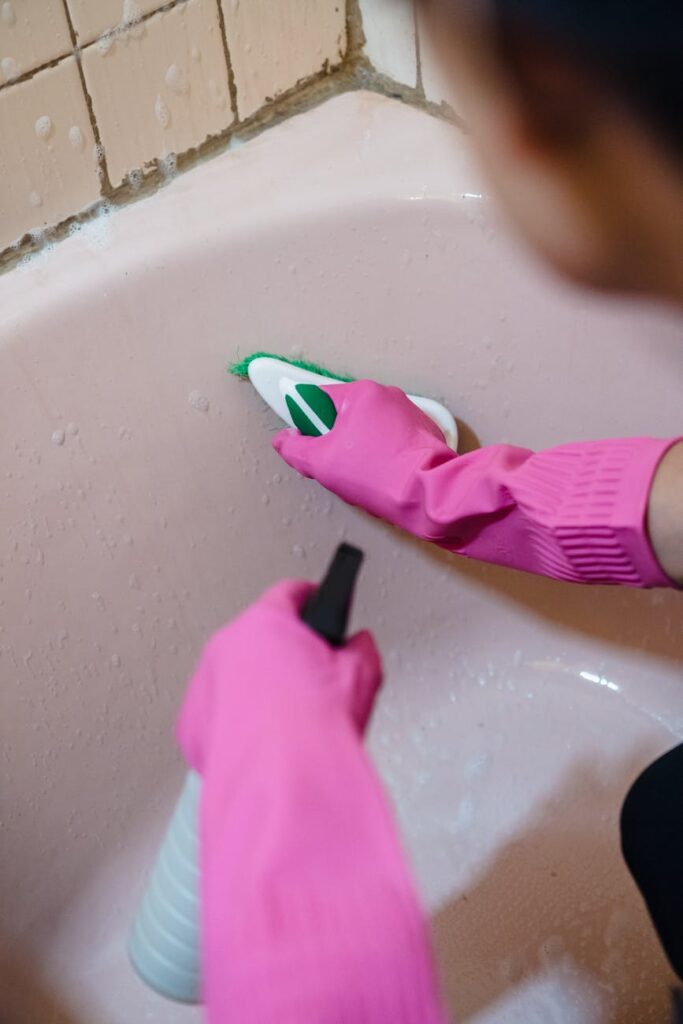
- Rubber gloves
- A scrub brush or sponge
- A bucket
- White vinegar or hydrogen peroxide
- Baking soda (optional)
- A spray bottle
- A squeegee
- Old towels or rags
- Remove Items: Take out all personal items, such as shampoo bottles, soap dishes, and towels.
- Ventilate: Open a window or turn on the bathroom fan to improve airflow.
- Vinegar Method: Fill a spray bottle with white vinegar. Spray generously on the affected tiles and grout.
- Hydrogen Peroxide Method: Alternatively, use hydrogen peroxide in a spray bottle. This is effective for deeper stains.
- Use a scrub brush or sponge to scrub the tiles and grout vigorously. Focus on corners and edges where mould tends to accumulate.
Why This Problem Happens
Understanding why mould develops can help you tackle the issue more effectively. Mould spores are present in the air and can settle on wet surfaces. When combined with the moisture from daily showers and the organic material found in soap and shampoo, it creates the perfect conditions for mould growth.
Additionally, if your bathroom lacks proper ventilation, humidity levels can remain high long after the shower has ended, exacerbating the problem.
How to Fix Mouldy Shower Tiles (Step-by-Step)
Step 1: Gather Your Supplies
Before you start cleaning, gather the necessary supplies:
Step 2: Prepare the Area
Step 3: Apply the Cleaning Solution
Step 4: Let it Sit
Allow the cleaning solution to sit for at least 10-15 minutes. This will help break down the mould.
Step 5: Scrub the Area
Step 6: Rinse Thoroughly
After scrubbing, rinse the tiles with warm water. Ensure all cleaning solution is washed away.
Step 7: Dry the Area
Use old towels or rags to dry the tiles thoroughly. This step is crucial in preventing mould from returning.
Step 8: Dispose of Waste
Properly dispose of any cleaning materials and wash your scrubbing tools to avoid spreading mould spores.
Best Cleaning Methods
1. Baking Soda and Vinegar
Mix baking soda and vinegar to create a paste. Apply it to mouldy areas, let it sit for 30 minutes, then scrub and rinse.
2. Commercial Mold Removers
If natural methods aren’t cutting it, consider using a commercial mould remover. Follow the product instructions carefully.
3. Steam Cleaning
Using a steam cleaner can be an effective way to kill mould without chemicals. The high temperature penetrates surfaces, eliminating mould spores.
Common Mistakes to Avoid
1. Using Bleach: While bleach may seem effective, it can sometimes exacerbate mould problems by providing moisture and not penetrating porous surfaces.
2. Neglecting Grout: Mould can easily hide in grout lines, so be sure to clean these areas thoroughly.
3. Not Ventilating: Skipping proper ventilation during and after cleaning can lead to mould returning quickly.
4. Ignoring Regular Maintenance: Failing to clean regularly can make mould harder to remove over time.
Prevention Tips
1. Increase Ventilation: Use exhaust fans while showering and leave the bathroom door open afterward to reduce humidity.
2. Wipe Down Surfaces: After each shower, use a squeegee to remove excess water from tiles and glass.
3. Use Mould-Resistant Products: Consider mould-resistant paint and grout when renovating.
4. Regular Cleaning: Clean your shower tiles at least once a week to prevent mould build-up.
Frequently Asked Questions
1. How often should I clean my shower tiles?
Aim to clean your shower tiles at least once a week to prevent mould growth.
2. Can I use bleach on mouldy tiles?
While bleach can kill mould, it may not penetrate porous surfaces effectively and can sometimes worsen the problem. Opt for vinegar or hydrogen peroxide instead.
3. Is mould dangerous?
While most household moulds are not harmful, some can cause allergic reactions or respiratory issues. It’s best to address mould problems promptly.
4. What should I do if mould keeps coming back?
If mould keeps returning, check for leaks or poor ventilation in your bathroom and address those issues.
5. Can I prevent mould without chemicals?
Yes, regular cleaning with natural solutions like vinegar and baking soda can effectively prevent mould without harsh chemicals.
6. What’s the best way to ventilate my bathroom?
Use an exhaust fan while showering, leave the door open, and consider installing a dehumidifier if moisture is a persistent problem.
By following the steps outlined in this guide, you can effectively tackle and prevent mouldy shower tiles, keeping your bathroom clean and inviting. Stay tuned for Part 2, where we’ll explore more advanced cleaning techniques and solutions.