
Moldy Shower Tiles Bathroom Guide Part 2
Introduction
Moldy shower tiles can quickly turn a serene bathing space into a source of frustration and embarrassment. Not only do they look unappealing, but they can also lead to more serious issues if not addressed promptly. This guide will help you understand what causes mold growth on shower tiles, how to effectively clean and fix the problem, and preventative measures to keep your bathroom mold-free.
What Causes Bathroom Mold?
Mold thrives in warm, damp environments, making your bathroom an ideal breeding ground. Here are the primary factors contributing to mold growth on shower tiles:
- High Humidity: Bathrooms often retain moisture, particularly after showers.
- Poor Ventilation: Inadequate airflow allows humidity to linger.
- Soap Scum: Soap residue can create a food source for mold.
- Neglected Cleaning: Irregular cleaning habits can lead to a build-up of grime.
- Leaky Fixtures: Water leaks from faucets or pipes can increase moisture levels.
- Rubber gloves
- Protective eyewear
- Scrub brush or sponge
- Spray bottle
- Cleaning solution (vinegar, bleach, or a commercial mold remover)
- Bucket
- Old toothbrush (for grout)
- Soft cloth or paper towels
- For Vinegar: Fill a spray bottle with white vinegar. Spray directly onto the moldy tiles and let it sit for 30 minutes.
- For Bleach: If you choose bleach, mix one cup of bleach with one gallon of water in a bucket. Use a sponge or brush to apply the solution to the affected areas.
- Using Too Much Water: Excess water can promote further mold growth. Always dry surfaces after cleaning.
- Ignoring Grout: Mold often hides in grout. Make sure to scrub these lines thoroughly.
- Not Ventilating: Failing to ventilate can lead to inhalation of harmful fumes, especially from bleach.
- Skipping Regular Maintenance: A one-time clean isn’t enough. Regular cleaning is essential to preventing mold.
Understanding these causes is the first step towards effective cleaning and prevention.
Why This Problem Happens
Mold growth is not just a cosmetic issue; it indicates a larger problem with humidity and moisture control. When you shower, steam rises and condenses on cooler surfaces, creating the perfect environment for mold spores to settle and thrive. Furthermore, if your bathroom lacks proper ventilation—like exhaust fans or windows—the moisture has nowhere to escape, exacerbating the issue.
Additionally, if you frequently use products that leave behind residues, such as certain body washes or shampoos, it can feed mold growth. All of these factors combined can lead to unsightly, moldy tiles that require immediate attention.
How to Fix Bathroom Moldy Tiles (Step-by-Step)
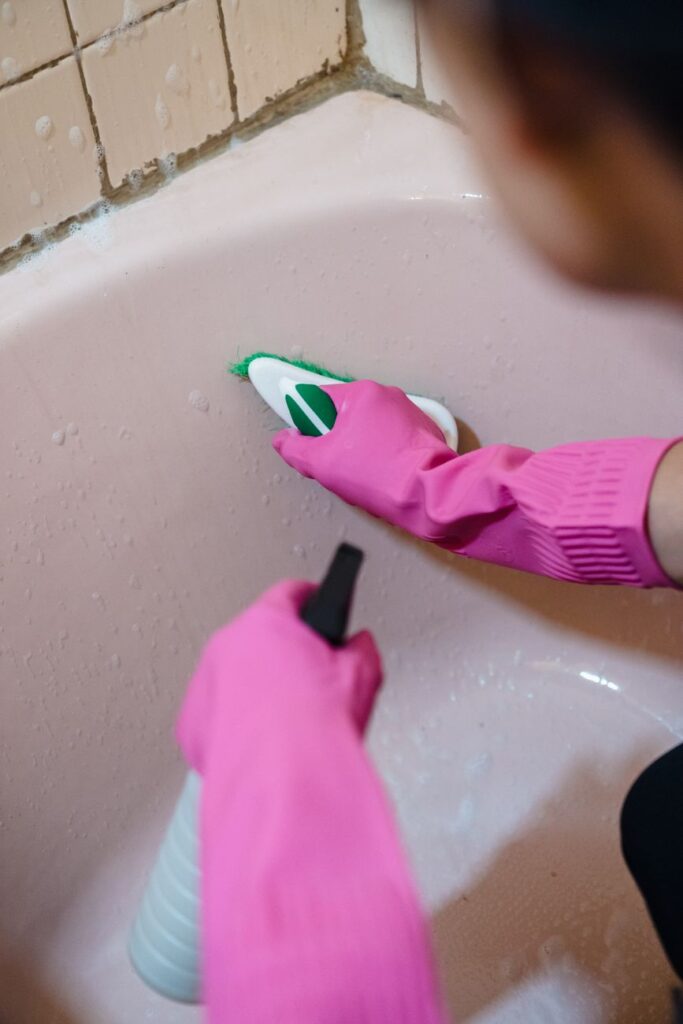
Step 1: Gather Your Supplies
Before you start cleaning, gather the following supplies:
Step 2: Ventilate the Area
Open windows and turn on exhaust fans to ensure proper ventilation. This step is crucial when using strong cleaning solutions like bleach.
Step 3: Apply Cleaning Solution
Step 4: Scrub the Tiles
Using a scrub brush or sponge, scrub the tiles thoroughly. Pay special attention to grout lines, as mold often hides in these crevices. For stubborn spots, an old toothbrush can help you get into tight areas.
Step 5: Rinse Thoroughly
After scrubbing, rinse the tiles with warm water to remove any cleaning solution. Ensure all residues are washed away to avoid any slip hazards.
Step 6: Dry the Area
Use a soft cloth or paper towels to dry the tiles completely. This step is vital in preventing future mold growth.
Step 7: Repeat if Necessary
For severe mold infestations, you may need to repeat the cleaning process. Persistent mold may require multiple treatments.
Best Cleaning Methods
1. Vinegar: An effective and natural mold killer that is safe for most surfaces.
2. Bleach: Strong and effective but should be used with caution.
3. Commercial Mold Removers: These products are specially formulated and often contain powerful ingredients. Follow the manufacturer’s instructions carefully.
4. Baking Soda: A mild abrasive that can help scrub away mold when mixed with water to form a paste.
Note: Always test any cleaning solution on a small, inconspicuous area first to ensure it does not damage your tiles.
Common Mistakes to Avoid
Prevention Tips
1. Improve Ventilation: Install an exhaust fan or keep windows open during showers to reduce humidity.
2. Regular Cleaning: Clean your shower tiles weekly to prevent mold build-up.
3. Squeegee After Use: Use a squeegee to remove excess water from tiles after each shower.
4. Seal Grout: Consider applying a grout sealant to protect against moisture penetration.
5. Use Mold-Resistant Products: Opt for mold-resistant caulk and paint in your bathroom.
6. Keep Bathroom Dry: Wipe down surfaces after use to minimize moisture.
Frequently Asked Questions
1. How often should I clean my shower tiles to prevent mold?
Aim to clean your shower tiles at least once a week to prevent mold and soap scum build-up.
2. Can I use vinegar and bleach together for cleaning?
No, mixing vinegar and bleach creates toxic fumes. Use them separately and ensure the area is well-ventilated.
3. What is the best way to clean grout?
Use a mixture of baking soda and water to form a paste. Apply it to the grout, let it sit for 10 minutes, then scrub with an old toothbrush.
4. How do I know if the mold is gone?
After cleaning, inspect the area for any discoloration or growth. If it looks clean and there’s no lingering odor, it’s likely mold-free.
5. What should I do if the mold keeps coming back?
If mold continues to return, consider consulting a professional. Persistent mold may indicate underlying plumbing issues or inadequate ventilation.
6. Is it safe to use bleach on colored tiles?
Bleach can discolor colored tiles, so it’s best to test a small area first or opt for vinegar or a commercial cleaner designed for colored surfaces.
By following this guide, you can effectively tackle moldy shower tiles and enjoy a clean, welcoming bathroom. Regular maintenance and preventive measures will ensure your space remains mold-free for years to come.