
Moldy Shower Head Mould & Damp Guide Part 2
Introduction
Mould and damp in the bathroom are common issues, particularly around the shower head. Not only can they affect the aesthetic of your space, but they can also lead to unsanitary conditions. This guide will help you understand what causes mould and damp, how to effectively clean it, and tips for prevention.
What Causes Mould & Damp?
Mould thrives in environments that are warm, damp, and poorly ventilated. In bathrooms, shower heads often become breeding grounds for mould due to the following factors:
1. High Humidity: Showers create steam, raising humidity levels.
2. Water Accumulation: Water can accumulate in crevices and on surfaces, creating an ideal environment for mould growth.
3. Poor Ventilation: Lack of airflow keeps moisture trapped.
4. Organic Matter: Soap scum and hair can provide nutrients for mould.
Understanding these causes is essential for effective treatment and prevention.
Why This Problem Happens
Mould growth on shower heads is often a result of neglect. When not cleaned regularly, mineral deposits, soap scum, and moisture build up. This creates a perfect breeding ground for mould spores. Additionally, if your bathroom lacks proper ventilation, the humidity can linger long after a shower, exacerbating the problem.
How to Fix Mould & Damp (Step-by-Step)
Step 1: Gather Your Supplies
You will need:
- White vinegar
- Baking soda
- An old toothbrush or soft-bristled brush
- A spray bottle
- A microfiber cloth
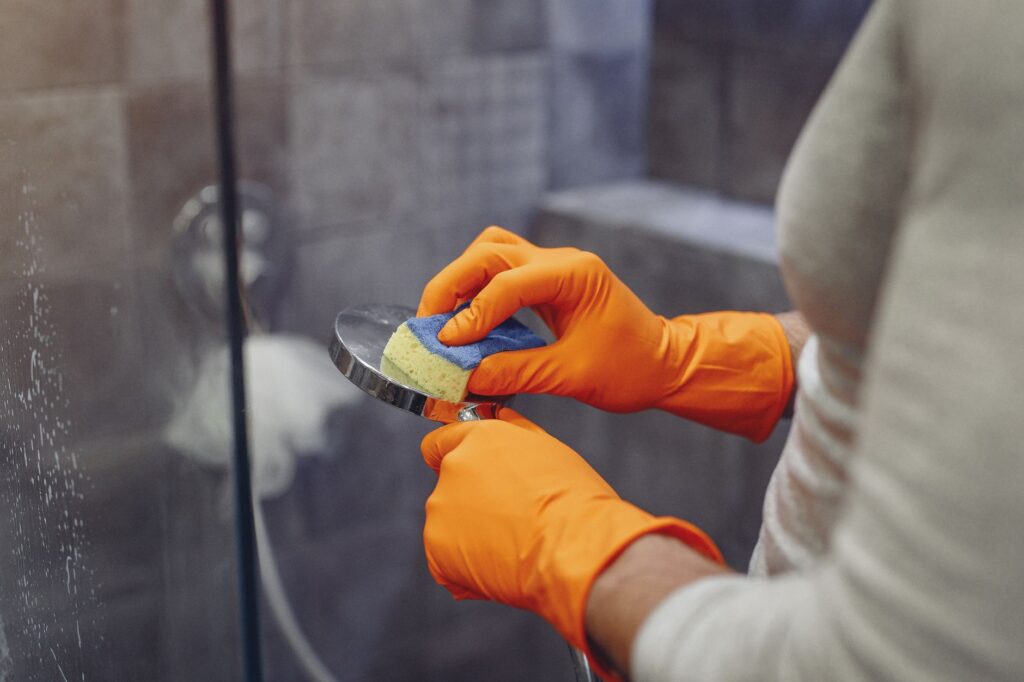
- Rubber gloves
Step 2: Remove the Shower Head
If possible, detach the shower head from the pipe. This will make the cleaning process more effective. If you cannot remove it, don’t worry; you can still clean it thoroughly while it’s attached.
Step 3: Soak in Vinegar
Fill a bowl or bucket with white vinegar, and immerse the shower head. Let it soak for at least 30 minutes. Vinegar is acidic and will break down mineral deposits and kill mould.
Step 4: Scrub Away Residue
Using the old toothbrush, scrub the shower head to remove any remaining mould or deposits. Pay attention to crevices where mould tends to hide. Rinse it thoroughly with warm water.
Step 5: Baking Soda Treatment
If residual mould is stubborn, create a paste with baking soda and a little water. Apply it to the affected areas and let it sit for 10-15 minutes before scrubbing again. Rinse with warm water.
Step 6: Reattach and Run Water
Once cleaned, reattach the shower head if you removed it. Turn on the shower for a few minutes to flush out any remaining vinegar or baking soda.
Step 7: Dry the Area
Use a microfiber cloth to dry the shower head and surrounding areas to eliminate any moisture.
Best Cleaning Methods
1. Vinegar Spray: For regular maintenance, fill a spray bottle with equal parts vinegar and water. Spray the shower head after each use to prevent mould growth.
2. Hydrogen Peroxide: If vinegar doesn’t work, try hydrogen peroxide. It’s effective at killing mould spores. Spray it on the affected areas and let it sit for 10 minutes before wiping clean.
3. Commercial Cleaners: If natural methods don’t yield results, consider using a commercial mould remover. Always follow the manufacturer’s instructions.
Common Mistakes to Avoid
1. Neglecting Regular Cleaning: Avoid long gaps between cleanings. Regular maintenance is key to preventing mould.
2. Using Abrasive Tools: Scrubbing too hard or using abrasive brushes can damage the finish of your shower head.
3. Ignoring Ventilation: Failing to improve bathroom ventilation can lead to repeated mould issues. Always ensure your bathroom is well-ventilated.
4. Overlooking Other Areas: Mould can spread. Don’t just focus on the shower head; check surrounding tiles, walls, and the shower curtain.
Prevention Tips
1. Improve Ventilation: Install an exhaust fan or open a window to reduce humidity levels in your bathroom during and after showers.
2. Wipe Down Surfaces: After each shower, use a squeegee or towel to wipe down the shower head and walls to remove excess moisture.
3. Use Mould-Resistant Products: Consider using mould-resistant shower curtains and bathroom paints to help prevent growth.
4. Keep it Dry: Store toiletries in a dry area and keep surfaces clear to prevent moisture accumulation.
5. Regular Inspections: Periodically check for signs of mould and address any issues immediately.
Frequently Asked Questions
1. How often should I clean my shower head?
Aim to clean your shower head every month to prevent mould and mineral buildup.
2. Can I use bleach to clean mould from my shower head?
While bleach can kill mould, it is not always recommended as it can damage certain finishes and may not be effective on porous surfaces.
3. What if my shower head has a lot of mineral buildup?
Soaking in vinegar will help dissolve mineral buildup effectively. For severe cases, consider using a descaling agent.
4. Is it safe to use vinegar on all types of shower heads?
Vinegar is generally safe for most materials, but avoid using it on natural stone or certain metals. Always check manufacturer guidelines.
5. How can I tell if my mould problem is severe?
If mould spreads rapidly or has a strong musty smell, it may indicate a deeper issue. Consider consulting a professional if this occurs.
6. What are the signs of mould growth in my bathroom?
Look for black spots, a musty odor, or discoloration on walls, shower heads, and tiles.
By following the steps and tips outlined in this guide, you can effectively manage and prevent mould and damp issues in your bathroom, ensuring a clean and healthy shower experience.