
Bathroom Odor Removal Stains Guide Part 1
Introduction
Bathroom odors can be unpleasant, but they can also lead to unsightly stains if not addressed promptly. Stains in the bathroom can come from various sources, including mildew, soap scum, and hard water deposits. Understanding how to tackle these stains effectively is crucial for maintaining a fresh-smelling and visually pleasing bathroom. This guide will provide you with practical, actionable steps to identify, address, and prevent these stains, ensuring your bathroom remains a clean and inviting space.
What Causes Stains?
Stains in the bathroom often arise from a few common culprits:
1. Mildew and Mold: High humidity levels can lead to the growth of mildew and mold, which often appear as dark or greenish stains on walls, ceilings, and grout.
2. Soap Scum: Soap residue can accumulate on surfaces, forming a filmy layer that traps dirt and bacteria, contributing to odors and stains.
3. Hard Water Deposits: Minerals in hard water can leave behind white or cloudy stains on faucets, showerheads, and tiles.
4. Toothpaste and Hair Products: Spills from everyday products can leave colorful or sticky stains on counters and sinks.
5. Urine and Waste: Improper cleaning around toilets can lead to yellow or brown stains, which can also contribute to odors.
Why This Problem Happens
Understanding why stains form in the bathroom can help you take preventive action. High humidity and poor ventilation are primary factors that promote mold and mildew growth. Lack of regular cleaning allows soap scum and hard water deposits to build up over time. Additionally, inadequate cleaning around toilets can allow urine and waste to accumulate, resulting in persistent stains and odors.
How to Fix Stains (Step-by-Step)
Step 1: Gather Your Supplies
Before tackling stains, gather the following cleaning supplies:
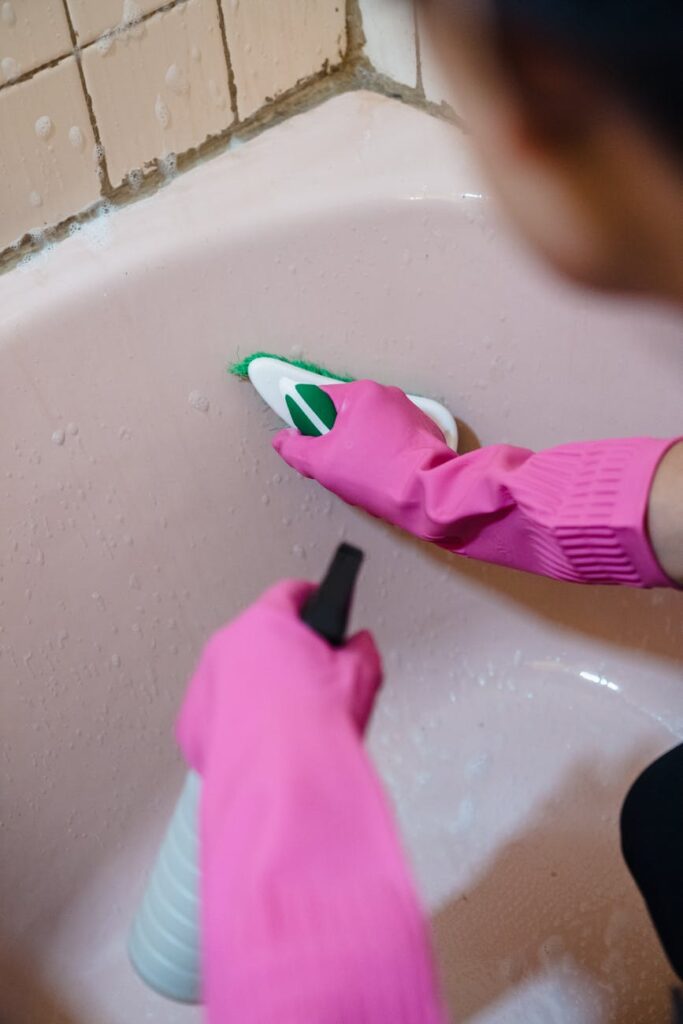
- Rubber gloves
- Scrub brush
- Microfiber cloths
- Baking soda
- White vinegar
- Hydrogen peroxide
- Commercial bathroom cleaner
- Toilet bowl cleaner
- A bucket or spray bottle
- For Mildew and Mold: Mix equal parts of white vinegar and water in a spray bottle.
- For Soap Scum: Create a paste with baking soda and water.
- For Hard Water Deposits: Use straight vinegar or a commercial descaler.
- For General Cleaning: Use a commercial bathroom cleaner suitable for your surfaces.
- Spray or apply the cleaning solution directly onto the stained area.
- For tough stains, let the solution sit for 10-15 minutes to penetrate.
Step 2: Identify the Stains
Examine each area for specific stains. Determine whether they are due to mildew, soap scum, hard water, or other sources. This will guide your cleaning approach.
Step 3: Prepare Your Cleaning Solution
Step 4: Apply the Cleaner
Step 5: Scrub the Area
Using a scrub brush or cloth, vigorously scrub the stained area. Pay extra attention to grout lines, corners, and crevices where stains tend to accumulate.
Step 6: Rinse Thoroughly
After scrubbing, rinse the area with clean water to ensure no cleaning solution remains. This is especially important for surfaces that come into contact with skin.
Step 7: Dry the Area
Use a microfiber cloth to wipe down surfaces and prevent new stains from forming due to moisture.
Best Cleaning Methods
1. Vinegar and Baking Soda: This combination is effective for soap scum and hard water stains. Apply baking soda to the stain, then spray with vinegar. Let it fizz for a few minutes before scrubbing.
2. Hydrogen Peroxide: For mildew and mold, hydrogen peroxide can be an effective disinfectant. Spray it directly on the affected area, let it sit, then scrub and rinse.
3. Commercial Cleaners: When in doubt, a commercial cleaner designed specifically for bathrooms can save time and effort. Always follow the manufacturer’s instructions.
4. Steam Cleaning: For deep cleaning, consider using a steam cleaner, which can effectively remove both stains and odors without harsh chemicals.
Common Mistakes to Avoid
1. Neglecting Ventilation: Poor airflow encourages mold and mildew growth. Always ventilate your bathroom, especially after showers.
2. Using Abrasive Cleaners: Avoid harsh scrubbing pads or abrasive cleaners that can damage surfaces.
3. Ignoring Grout Lines: Grout can trap moisture and stains. Regularly clean and seal grout to prevent buildup.
4. Rushing the Process: Allow cleaning solutions to sit for the recommended time. Rushing can lead to inadequate cleaning.
5. Using the Wrong Products: Make sure your cleaning products are suitable for the surfaces you are cleaning to avoid damage.
Prevention Tips
1. Regular Cleaning: Establish a weekly cleaning routine to keep stains at bay.
2. Improve Ventilation: Use an exhaust fan or open a window during and after showers to reduce humidity.
3. Wipe Down Surfaces: After use, wipe down sinks, counters, and shower walls to prevent soap scum and mildew buildup.
4. Seal Grout: Regularly apply a grout sealer to protect against moisture and stains.
5. Consider Water Softeners: If you have hard water, a water softener can reduce mineral deposits that lead to stains.
Frequently Asked Questions
1. How often should I clean my bathroom to prevent stains?
Aim for a thorough cleaning once a week and spot clean as needed, especially after heavy use.
2. Can I use bleach to remove stains in the bathroom?
While bleach can kill mold and mildew, it may not effectively remove stains and can damage certain surfaces. Always test on a small area first.
3. What should I do if stains persist after cleaning?
If stains remain, consider using a stronger commercial cleaner or consulting a professional cleaning service, especially for mold issues.
4. Are there any natural alternatives to commercial cleaners?
Yes, vinegar, baking soda, and hydrogen peroxide are effective natural alternatives for many bathroom stains.
5. How can I prevent mildew growth in my bathroom?
Ensure proper ventilation, keep surfaces dry, and use mildew-resistant paint or products.
6. Is it safe to mix different cleaning products?
No, mixing cleaning products can create harmful fumes. Stick to one product at a time unless otherwise specified.
By following these steps, you can effectively tackle bathroom stains, remove unpleasant odors, and maintain a clean and fresh environment in your home. Stay tuned for Part 2, where we will delve deeper into specific cleaning techniques and products tailored for unique bathroom challenges.